

How to Ride Your Horse in Circles

Updated:
September 4, 2025Keeping Circles on Track
By Lindsay Grice, Equestrian Canada coach and judge
The equestrian’s quest for the perfect circle crosses all disciplines. For Western and English riders, geometry matters. Horse show judges expect to see circles of uniform size and curves ridden with the horse’s body shaped to follow the arc. In dressage and reining, riders must show a clear distinction between large and small circles. In working equitation, circles around barrels and figure-eights must be symmetrical. In equitation and horsemanship patterns, judges frown on oval-shaped “circles.” In all classes, judges will deduct marks for circles of inaccurate size and over-arced or counter-flexed body alignment.
Geometry: Beyond Aesthetics
Circles become ovals when horses cut in, flattening the shape on one side and drifting out on the other. There’s a perfectly good reason from the horse’s point of view…more on that later. Cutting in or bulging out of circles and curves is a matter beyond appearance — the horse’s body slips out of alignment, shifts off-balance, and his gaits deteriorate.

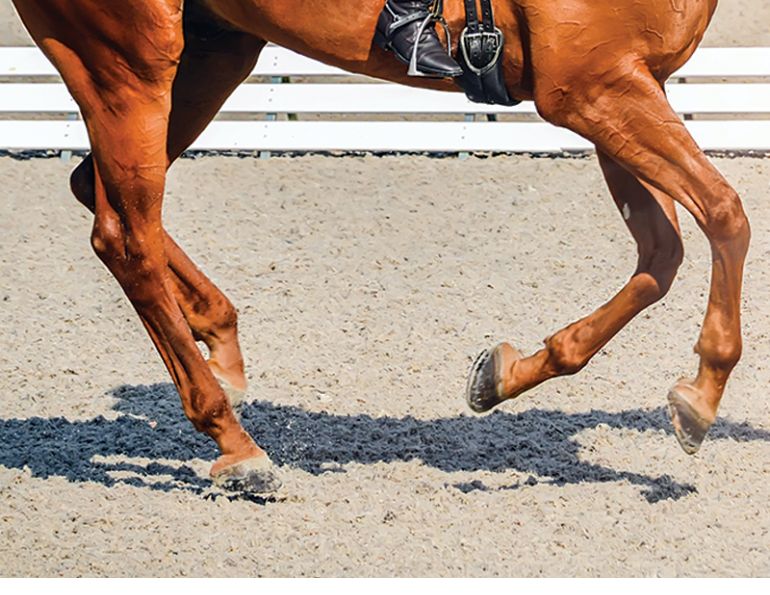
This horse is bulging out from the arc of the circle, inattentive to the outside leg and neck rein aids.
Here are some steering issues and their effects that I see when coaching riders and from the judge’s booth:
Cutting in — When the horse cuts the arc of a circle or curve, his body is crooked. His shoulder shifts to the inside of the track, commonly called “dropping” his shoulder. In extreme cases, when a horse ducks in abruptly, he can lose balance and fall. When a horse cuts to the inside, his rider instinctively reacts by pulling his head to the outside. Counter-bent, the horse’s gaits lose their flow, as if there’s a kink in the hose. He misses lead changes and makes disorganized transitions. A counter-bent horse jumps awkwardly or hits trot-over poles in a trail course, not only because he’s unbalanced but because he can’t focus on the obstacle with his head tipped to the outside. Cutting in off-line, after a jump or trail obstacle, leaves you with less room to mentally and physically prepare for the next fence or obstacle.
Related: Navigating the Gate with Your Horse
Drifting out — It’s the battle of the bulge. A bulging circle can range from disappointing — resulting in losing marks for accuracy on the judge’s scorecard — to disastrous: a horse exits a circle on a tangent; a barrel racer exits a curve into the fence; or a hunter pony exits the gate! If the horse’s haunches fishtail outwards, he’ll swap leads or break gait. When a horse drifts outward, off the line of approach to a trail obstacle or a jump, it disrupts the rhythm and flow of the course, resulting in an awkward take-off distance or “chip.” Horses jump in poor form or even run out, past the fence, due to a crooked approach.
Essential Ingredients for Circular Circles
Balance — An accurately ridden figure is easiest when the horse is laterally balanced — equal weight is distributed on his outside and inside limbs. Longitudinally, when the horse shifts weight from his forehand to his hind end, he’s “lighter.” As the circles become small this will be more important. A horse steers, moves, jumps, stops, and makes transitions better when balanced and light.
Alignment — When the horse has his head, neck, shoulders, and hips in line with his path of travel, he’s straight. So, curved path or straight, no body part should drift off the track.
Self-carriage (the icing on the cake) — When the horse stays consistent in his alignment, stays on the line of travel, stays in balance, and stays in pace without the rider holding him there — he’s “light.” He’s discovered, by trial and error, the perimeters of the chute between my hand and leg aids. And he finds release, or negative reinforcement, within the chute. In self-carriage, circles and curved figures become a beautiful thing indeed.

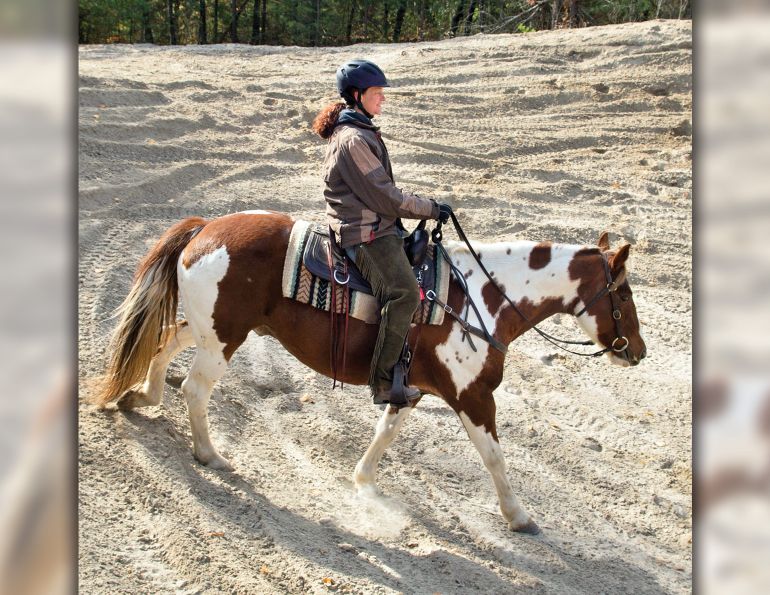
The horse is aligned between the corridor of the reins and legs, following the circle’s perimeter.
Related: Crossing Poles In Stride for English and Western Riders
Squashed Circles: It’s Natural
In my years of training horses and watching them from the judge’s chair, I’ve come to anticipate the equine tendency to cut in one half of almost every circle and swell out on the other half. Why? That’s my favourite question. Why do horses do what they do? I teach riders to appreciate the instinct driving equine behaviour. With that awareness, riders can anticipate and prevent a host of undesired responses before they happen and prevent faulty figures before they appear on the score sheet.
Why horses bulge out — The horse is a herd animal, hardwired to believe there’s safety in numbers. He’s naturally magnetized toward the gate, the barn, or another horse. Left unchecked, the horse’s draw to the herd overrides the outside leg as the rider attempts to keep him on track. At best, the horse ignores the leg and leaves the circle. At worst, the rider’s outside leg gets sandwiched into the fence or earns a kick from another horse not wishing to play bumper cars in the warm-up ring!
Why horses cut in — Horses learn to anticipate anything they’ve learned by repetition. If the rider always transitions to a canter on a circle, a curve after a lead change, or turns to the inside after a jump at the end of a line, it won’t be long before the horse starts anticipating what’s coming and makes turns too early. Riders may unwittingly cue their horses to cut in by dropping their own shoulders in anticipation of the turn, leaning in as a motorcycle rider might lean on a curve. The horse compensates by “following the leaner.”
Five Tips to Keep the Horse on Track
1. Define your line — If you fail to plan, you plan to fail. Indecision is often at the root of poor geometry; the rider has a general idea of the circle track but leaves the specifics up to the horse. As a novice rider, my instructor coached me to look “ahead.” Not wanting to appear naïve, I didn’t ask what I was wondering: Where exactly is ahead? Mid-air? Between the horse’s ears? Years later while training hundreds of horses and riding thousands more circles, I connected the dots: geometry “happened” when I (a) plotted destination points in the dirt ahead, and (b) decisively directed my horse through those points.
The rider is the decision maker, charting the path for the horse to travel. On circles, pinpoint four dots around the perimeter, like key numbers on a clock face. As you approach one point, lift your eyes to the next, making your decisions well ahead of your horse’s feet. Your coach should be able to tell where you’re heading by reading your eyes.
The well-worn ditch around the arena’s perimeter is the default of many riders. A horse is happy to oblige, instinctively gravitating to the well-trodden path as the safest option. Yet, in choosing the path of least resistance, riders aren’t practising their lateral aids. Stuck in the rut, they won’t develop the necessary tools to override magnets such as in-gates and pasture mates, drawing their horses off-line.
2. Direct each train car — Picture your horse’s nose over your line of travel, with his front and back feet straddling that line. Comparing your horse to a train — his head and neck are the first train car, his shoulders the second, followed by his haunches as the caboose. When the horse derails, cutting in or drifting out, steering him back on track by pulling on the inside or outside rein alone will not prevent the other two cars from falling off the rails. You now need the physical tools to maneuvre each train car and direct it along the track.
Every rider’s toolbox should contain the basic lateral movements: leg yields, side passes, turns on the forehand and haunches.
Now, when the horse tries to shortcut a turn, he gets to work a little harder by leg yielding outward, beyond the circumference of the curve or deeper into the corner. Expect the horse to become attentive to light pressure of your inside calf at the girth, shaping the arc of a circle. To underscore the point, I’ll ask my riding students to halt when they feel their horse’s first inclination to flatten the curve, then side-pass outward along the “spoke” of the wheel.
Related: Leverage Bits 101 and the Art of Neck Reining
Here’s an exercise to contain bulging circles and teach attentiveness to your outside aids:
Try riding 90-degree corners around a square perimeter. Your outside rein limits the amount of neck bend and shoulder bulge as you move his shoulders around each corner. It’s counterintuitive; instead of turning with your inside hand, shift the focus to your outside aids. Maintain forward motion — keep your horse’s step from fizzling into a stationary turn on the haunches.
3. Is it me? Check for rider posture errors — Leaning in will only invite the horse to do the same. Keep your shoulders square, even straightening up before a turn.
4. Anticipate the bulge — Because prey animals are creatures of habit, inclined to gravitate toward safety, be prepared for the horse to drift out and cut in somewhere on every circle. Determine possible magnets before your horse derails toward them. Prepare as you may, a horse determined to go in a certain direction can push right through your leg aids. If the horse has had prior success ignoring your leg, consider a spur or dressage whip to add some inspiration. If you can’t follow through on your request, you’ll forfeit a teachable moment. Having seen that window of opportunity, the horse is likely to opt for the escape again. We can untrain our horses by failing to correct errors in the moment.
Visualize the gate half of your circle with straight sides. You’ll break down the curve into smaller, straight turns — a modified version of your 90-degree turns. Be prepared to enlarge the top half, where horses are inclined to cut in, with a leg yield off your inside leg.
5. Anticipate, but don’t support — Preventing the horse from drifting out by holding on your outside leg or “holding his shoulder up” with an indirect rein does nothing to teach self-carriage. I’ve never been a fan of the term “support” referring to our riding aids. It’s not my job to hold my horse in place. Instead, make a timely correction on the first wayward step, then leave the horse alone.

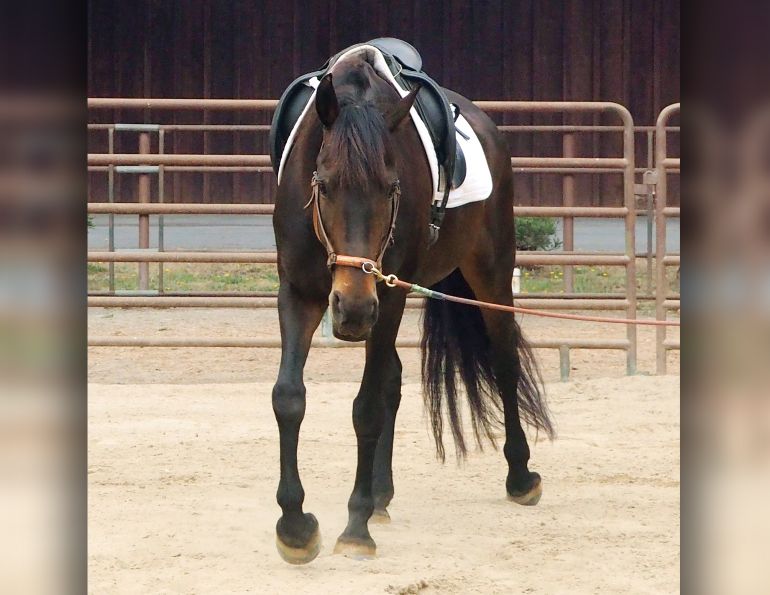
“Supporting” with an indirect rein doesn’t teach self-carriage. Instead, make your correction and then leave your horse alone.
6. Practice before performing — As a judge, it’s sad to see competitors open a “can of worms” by prematurely entering the show ring without their lateral skills in place. In an unfamiliar horse show atmosphere, the incentive for a horse to drift toward the familiar, such as his buddies at the horse trailer, is powerful. I hate to see disheartened competitors exit the ring after they’ve ridden circles like giant eggs, run out at a jump, or lost their balance as their horse ducked in on a corner.
Perfect lateral skills at home before taking the show on the road and you should be able to win the battle of the bulge!
Related: Turning Around: Pirouettes, Cow Turns and Reining Spins
Related: Leg Yield Training for Horses: Benefits, Purpose, and Technique
Photos courtesy of Lindsay Grice

Blogs & Podcasts

Advertisement

Related Articles


Advertisement

Featured Stories


Advertisement
