

First Aid for Trail and Home, Part 1: Wounds and Their Treatment

Updated:
October 3, 2020By Stan Walchuk, Jr.
Understanding first aid for horses is a lifelong learning experience born of necessity. Injury and illness are unpleasant realities for horse owners and trail riders, and although seeking the advice of a veterinarian should always be your first choice when dealing with a serious medical condition, if it happens on a trail ride you must be able to respond appropriately until the horse can be seen by a vet.
I do not pretend to be a vet, but years of hauling, remote riding, and keeping large numbers of horses, combined with a background in zoology, have afforded me some insight into equine first aid. When looking back at the injuries and sicknesses that have occurred during my 40 years of trail adventures, from stone bruises and sprains, to cuts, colic, and equine anemia, one might be inclined to ask: Why go out there if these things could happen? The reality is that injury and illness can just as easily occur at home, and a basic understanding of how to treat these maladies is absolutely essential for every horse owner.
Assess the Situation
When you are faced with a first aid situation, begin with a quick assessment of the horse for broken bones, injury to the head or eyes, and wounds. Assessing an injury mostly comes down to common sense. If the horse is relatively calm, first minimize movement by tying the horse up before continuing with treatment. If the horse is very excited, moving around, in a confined space, or there are other horses or debris such as trees, brush, or wire in the area, keep your own safety foremost in mind. Do not place yourself in a dangerous situation by barging in and trying to manhandle a distressed horse. Make the area safer to work in by removing any entanglements and waiting for the horse to calm down.
Over the years there have been a few occasions when a serious injury and an excited horse have required a scotch hobble or laying the horse down with a rope before treatment was possible. For trail riders who go on remote trips or travel the back country often, it’s a good idea to learn a user-friendly way to lay a horse down with a rope.
Many of us are attached to our horses. Witnessing your companion in distress can cause us excitement and upset equal to or greater than that of the horse, which is exactly what your horse does not need. I have a rule: No matter what happens on the trail, stay calm. The horse needs you to make clear, sensible decisions, and you need to be in the right state of mind to do so. If you fly off the handle or fall to the ground in a wave of tears, you will further agitate your horse.
Vital Signs
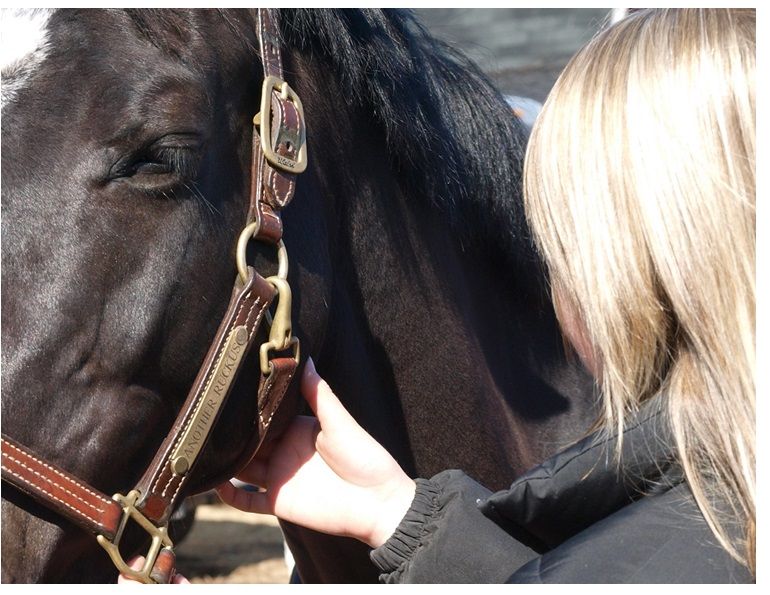
It is very important to know how to take your horse’s vital signs as this can help you evaluate the horse’s level of distress. It is also helpful to be able to relay your horse’s vital signs to your veterinarian if he is unavailable in person but can be reached by phone. A regular pulse rate is about 30 to 40 beats per minute at rest. Greater than 60 beats is abnormal. The pulse rate can be taken on the artery just under the cheekbone. Body temperature is taken with a lubricated thermometer in the anus and should be 99.5 to 101 degrees Fahrenheit. A temperature above 102 degrees is cause for concern. Dehydration can be determined by performing a simple pinch test or gum test. Pinch a small amount of skin on the neck just above the shoulder. The fold of skin you pinch should disappear as soon as you let go; if the fold remains or flattens slowly, the horse is dehydrated. You can also press your thumb against the horse’s gum just above the corner incisor, and if it takes longer than two to three seconds for the colour to return, the horse may be in a state of stress, or in shock (due to injury, colic, etc.), or he may be dehydrated.

The pulse rate can be taken on the artery just under the cheekbone. Photo: Pam MacKenzie

The pinch test to determine hydration is done just above the shoulder. Photo: Pam MacKenzie

The horse's temperature is taken with a lubricated thermometer in the anus. Photo: Pam MacKenzie
Treatment of Wounds
A horse has about 55 litres of blood and can lose about 20 percent of it before showing symptoms of low blood volume shock, and as much as 40 percent before death. Death from blood loss is uncommon in horses.
First response for wounds on a horse is almost identical to that for a human. If the wound is bleeding badly, or if blood is squirting out indicating an arterial cut, you first need to stop the bleeding with direct pressure, as firm as necessary until the bleeding stops. Application of pressure can be in the form of a balled towel or cloth, or your hand if a towel is not available. For a serious wound such as this, a vet should be called immediately.
Stopping the bleeding may be easier said than done. We had a two-year-old colt trailing behind its mother deep in the Alberta Rockies when it kicked out at the horse behind. It struck the edge of the long distance bell of the horse behind and sliced itself so deeply just above the point of the hock that it almost cut an artery. Blood shot out at an alarming rate and distance, and the colt was in no frame of mind to let anyone handle his back feet. Hurriedly we laid the horse down and applied direct pressure to the wound. Unfortunately the bleeding persisted and could not be stopped with direct hand pressure.

In a situation like this it is acceptable to apply a tourniquet (see Figure 1.) Use a balled up cloth as a pressure point and secure it with a cloth wrapped once around the limb and tied with an overhand knot. Place a short stick on the overhand knot, and then tie a square knot on top. Twist the stick to tighten the tourniquet and tape in place. I always carry electrical tape on the trail.
With the tourniquet in place, we made it into camp with the injured colt 15 minutes later.
Tourniquets need to be relieved of their pressure at regular intervals to allow circulation. In the colt’s case, it was a full day later before we could relieve the pressure of the tourniquet without bleeding. I could not imagine how the foot had survived that long without blood flow, but here was a great lesson in the vitality of horses. Over time, secondary arteries can enlarge and take up the needed flow of blood. The recovery seemed a miracle to all of us who witnessed the injury.

www.ChristinaHandley.com - Rinse wounds with clean stream or lake water if no other clean water source is available. Photo: Christina Handley
Once the bleeding has stopped, clean wounds with clean water, and Betadine® (a povidone-iodine solution) or a saline solution. Hibitane® (chlorhexidine) can also be used. If you are at home, hose the wound, but for no longer than several minutes. If the exposed tissue begins to turn white, you have killed it with excessive hosing. Out on the trail, use a spray bottle or splash water onto the wound. Clean stream or lake water may be used if nothing else is available.
Make your own saline solution by stirring two tablespoons of salt into one gallon of water. Add Betadine® to the water until it is the colour of light tea. If you do not have Betadine® or salt, then use water only.
A sanitary cloth or sterile gauze can be used to lightly clean debris from the wound.
Now that the wound has stopped bleeding and is clean, you can apply a topical. For upper body wounds that are soft and weep, a spray or dry spray is often used, as an ointment will slough and not stick as well.
The wound is now ready to be bandaged. Bandaging a wound keeps it clean and free of debris, which can help prevent infection. The wound should remain bandaged until signs of healing (firming and scabbing over) appear.
Different Types of Wounds and Their Treatment
All puncture wounds should be considered serious, as they can result in tetanus (lockjaw), which is virtually a death sentence for the horse that has not been vaccinated against it. Tetanus bacteria is commonly found in soil and dead debris. I once saw a horse contract tetanus from a small stick that had jabbed and stuck between the foreleg and chest. Unnoticed, it took only a week for the horse to go into shock and die.
An iodine solution is often recommended to clean and treat punctures. Due to the aggressive nature of iodine it may be more effective for deep punctures; however, it is not recommended for use on wounds in general due to its tendency to kill healthy tissue.
Peroxide is also commonly used to clean wounds, particularly punctures; however, some vets claim that peroxide can drive contaminants deeper into the wound, and that it kills healthy cells.
Lower leg wounds require a different approach altogether. They often look less serious but can take longer to heal and are more likely to require a bandage or stitching since, if exposed, they are more prone to collecting dirt. Lower leg wounds are also more likely to grow proud flesh and a bandage will inhibit proud flesh as well as keep the wound clean and reduce inflammation.
As a rule, once lower leg wounds are cleaned, they are treated with the appropriate salve and wrapped with sterile gauze and a tensor bandage, but not so tight as to prevent adequate circulation. If you cannot clip or tie the bandage to secure it, then use electrical tape or ladies’ hose as an outer tie. Do not use duct tape as it is rigid and may apply too much pressure. Lower leg wounds should have the bandage removed and fresh dressing and bandages reapplied daily.
So, let’s review the steps to properly treating a wound: stop the bleeding, clean the wound, treat with the appropriate topical, and bandage as necessary.
Practically speaking, horses that spend time on the trail will inevitably have little “owees” where they clip a sharp stone or are jabbed with a stick; an exposed smaller wound that is kept clean will generally heal well with no topical. For small wounds and rubs where the skin is not broken, no treatment is necessary.
Smaller upper body wounds that are bleeding can be flushed (with salt water if possible) or wiped with a clean damp cloth, and then covered with an appropriate salve or spray. Smaller lower body wounds need to be assessed; when in doubt, apply a salve and bandages.
A little knowledge of equine first aid can go a long way toward helping your horse in the event of an injury. I would encourage those who are interested in learning more to visit such websites as www.stepaheadfarm.com. In the meantime, I hope this has been some help!
The publisher thanks Dr. David Reed for his assistance with this article.
The first aid information in this article is for information purposes only and should not be relied upon as a substitute for professional veterinary and/or medical advice. No liability will accrue to the publisher or author of the article in the event that a user suffers loss as a result of reliance upon the information.
Topical Treatments
Understanding topical ointments and sprays and lotions is a science unto itself. One of the reasons that home remedies are still popular with horse owners is that many of them, such as pine tar, which is an antiseptic, healing agent, and bug repellent, really do work and they are often cost effective. I think that one of the main complaints against them by veterinarians is that some of them can be harsh. The bottom line is that ranchers, farmers, and outfitters have always needed treatments that are effective and relatively cheap.
Figuring out what ingredients and which brands to purchase, and when and how to use them, is a head-scratching blister of a problem. What I do know is that I want my salve to stick well, heal the wound as quickly as possible, and repel flies. Personally – and this is just my old fashioned opinion from years of treating horse wounds – I do not really care if my topical treatments are organic or have the latest wonder ingredient. I just need them to work.
When selecting a topical product, you want to choose one that has antiseptic and antibacterial properties, as bacteria inhibit healing. Many topicals have agents to reduce the formation of proud flesh (tissue granulation), but this is a catch-22 as these agents typically reduce circulation which is critical for the healing of wounds.
Ointments are particularly excellent for helping to keep contaminants out of the wound, and they can help trap in blood which aids in healing.
Some vet recommended topical agents include Eclipse, Lacerum, silver sulfadiazine (often with aloe vera), Vetmycin, and Quick-Derm, to name a few. Many come in spray form, for upper body wounds, or salves.
Furacin (nitrofurazone) based topical treatments kill a wide spectrum of bacteria, but are considered by some to slow down the healing process.
Pure iodine does kill bacteria and viruses very effectively and is often used for sole punctures because it is aggressive, although harsh, but should never be used on a body wound.
As an antibacterial spray, some vets claim it is more effective to spray a wound with 5 ml of penicillin than it is to give an intra-muscular injection of 25 ml.
If you are overwhelmed by the options available, then consult with your vet. Always remember to wear gloves when applying any topical solution.

Blogs & Podcasts

Advertisement

Related Articles


Advertisement

Featured Stories


Advertisement
