Understanding the Equine Drive Line

Updated:
August 11, 2019By Jonathan Field
What is the drive line? In this excerpt from my book, I will explore the drive line and how important it is for you to understand where it is on the horse’s anatomy and how the horse responds to it when working at liberty, or when the horse is loose in the round pen. This, of course, is not a real, physical line; it is an imaginary vertical line which determines by body language the direction the horse will go in relation to your position in front of, or behind, the line. Think of the line more as a zone, not a hard line. Remember that every horse is different so the line’s position may also be different. Once you have the line firmly positioned in your mind, communicating with your horse will become easier, smoother, and more productive.
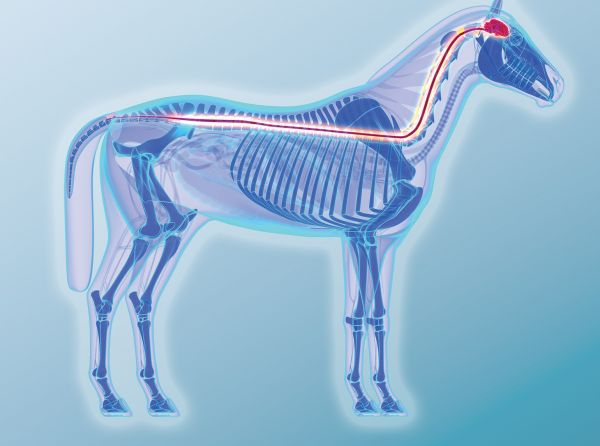
Imagine an approximate line that drops vertically between the point of the horse’s shoulder and the withers. That drive line is how you influence your horse to move toward you, away from you, faster and slower.
If you push into a horse’s personal space in front of him, which is forward of the drive line, you discourage forward motion. Direct your focus near his head and neck, and you can turn him away from you. On the other hand, push from way behind your horse, and he’ll accelerate forward motion. Or, push more at his hip and you drive his hip away. Knowing this, you can use pressure to cause a horse to go where you want him to. The key is to be very clear in your signal and position for various requests.
In fact, all prey animals have this imaginary drive line near the shoulders. It’s not a per¬fectly straight, uniform line, but more of a zone. Once you understand and are aware of how you use pressure in relation to the drive line, it will be very natural for your horse to understand you. Problems occur when you are standing in the wrong place for a horse to understand what it is you are asking. Being aware of your position in relation to the drive line is the next important lesson of liberty training. In this case, your horse is the teacher while you learn about using the drive line.
Each personal space bubble around a horse is individual to that horse. Your imaginary line from the withers to the point of his shoulder is just a general guide. Find your horse’s “personal” drive line by observing how he reacts when you apply pressure in different places; knowing where his drive line is will help you get the message across to your horse.
Let’s discuss how to begin using the drive line in the round pen.
The Anatomy of the Round Pen
To help make the round pen an effective tool in this liberty lesson, it is beneficial to have an understanding of where the middle is and how you apply pressure from that spot. Think of it like a dartboard, with a bulls-eye in the middle. The centre of the round pen is the most neutral place. When your horse is doing an exercise correctly, release all pressure by standing exactly at centre. It is your horse’s responsibility to maintain the Path and Speed that you ask of him — moving in active neutral — while you relax and stay still in the centre.
In the beginning, it helps to mark the centre of the pen with a cone or by drawing a circle on the ground. If you are even a little bit off centre, your horse may still feel pressure. For this reason, it’s important for you to have a feel for where the centre of the round pen is at all times, and you need to know exactly how far away from it you are when applying pressure.
Next, imagine increasingly larger, concentric circles or rings drawn around the centre, expanding out toward the walls. Mark three to four of them, about four feet apart, between you and the wall or fence. The actual number of circles you can make will depend on the size of your round pen. They denote “squeeze spots,” or places where you apply varying amounts of pressure, and will help you communicate with your horse by applying pressure to have him speed up, slow down, draw, and connect. The closer you step toward the outer edge of one circle, the more squeeze or pressure you apply to your horse.
One thing to remember as you use these lines to create squeeze spots is the importance of using the least amount of pressure possible. Otherwise, your horse may feel overwhelmed. He may bolt, turn, and run in the opposite direction, or even try to jump out of the pen to escape pressure. Work on your feel and communicating with just intent. Be sensitive to the amount of pressure your position puts on your horse.
Step 1: Bring Back in Front of the Drive Line
Bringing the horse back to you by stepping in front of his drive line is easy in a round pen. As the horse is moving, step from the middle of the circle in front of the horse, creating a point of decision for him. You create a bit of a tight spot between the fence and your body (a squeeze spot) so the horse’s easiest option is to look at you and stop.
If all your previous training is solid, the horse should come toward you. As he does, back up quickly, relieving the pressure, and showing him that he made the comfortable and desir¬able decision. However, if the horse turns away, slap the string on the ground, driving him from behind to show him that his decision was not the comfortable choice. Then, wait in the same spot for the horse to come back around and give him a chance to make the decision again. When he reaches the same place in the round pen, be ready in front of the drive line once more, to see if he whirls away again or stops to connect with you.

Photos (above and below): I step from the middle of the pen in front of Tessa’s drive line, creating a point of decision for her as she seeks comfort. She comes toward me, and I back up to give her space to move into and tell her she made the right choice about where to go. Photos: Robin Duncan Photography

Sometimes, horses will go back and forth half a dozen times before they decide that you are the only comfortable place. When they finally do stop, it is very important that you have a friendly body posture as you back up to give the horse the release of any pressure. After a short time, your horse will learn that when you step out in front of the drive line with inviting intent, you want him to come to you.
In the beginning, it’s common for your horse to lose his connection and go away, but that’s okay. Just use it as an excuse to practice drawing him back to you. What if he stops some distance away from you? You can’t do anything without movement, so jog across the pen, driving from behind the drive line to get forward movement. Then, set up bringing him back by stepping in front of the drive line. Remember, your goal is to have the horse find comfort and release with you.
Make sure you practice drawing in both directions. You will likely find your horse is better going one way than the other, so take the time to build up the weaker side until he can draw equally well from both sides.
Step 2: Bring Back Behind the Drive Line
Next, let’s try drawing your horse to you from behind the drive line. This exercise is more difficult than the previous one, standing in front of the drive line, because there is only open round pen ahead of him, and the horse has more space to run away. There isn’t a rope or squeeze spot to make going forward uncomfortable, so for this to work, you need to have established strong draw in your on-line sessions (earlier liberty training with a halter and lead).
This method of bringing a horse back to you is important because it doesn’t depend on the walls of the pen to influence your horse’s decision. It means you are one step closer to your goal of playing at liberty beyond the fence.

Photo: As Tessa passes by me; you can see I invite her with my left hand as if I had a lead rope in it. Photo: Robin Duncan Photography

Photo: Next, I apply pressure behind the drive line with a bend in my body to ask Tessa to disengage her hip and draw to me. She comes off the fence and wraps toward me. My posture behind the drive line is key so she doesn’t think I’m asking her to speed up. Photo: Robin Duncan Photography

Photo: After she has come off the fence and starts to come to me, I turn and move away from her, creating space for her to go into. Photo: Robin Duncan Photography
An excerpt from The Art of Liberty Training for Horses by Jonathan Field, used by permission of Trafalgar Square Books (www.horseandriderbooks.com).

The Art of Liberty Training for Horses is available from www.jonathanfield.net.
To read more articles by Jonathan Field on this site, click here.
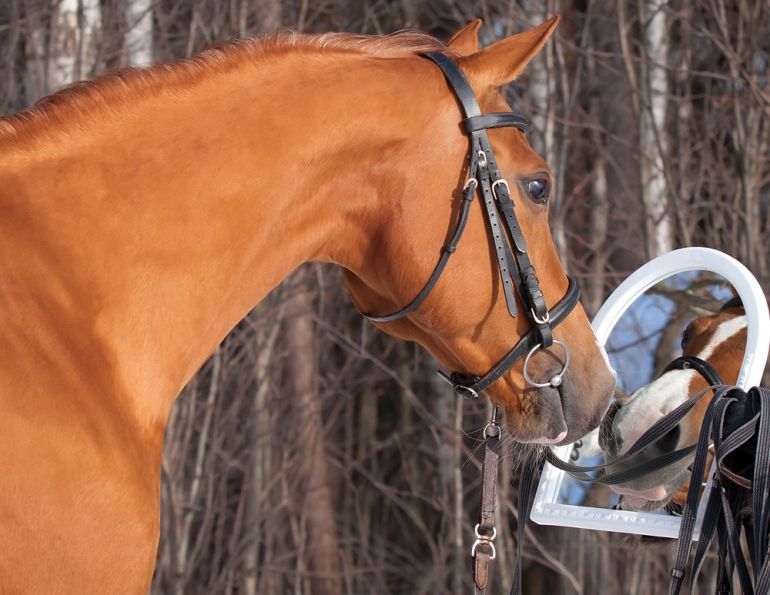
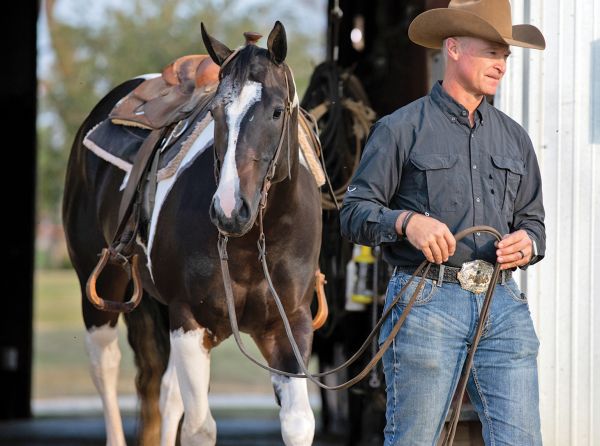
Main photo: One of the best places to learn about liberty is in a round pen. It allows your horse to be free without giving him room to leave completely. I use the round pen as an intermediate step between on-line skills (with halter and lead) and liberty in larger areas. Photo: Robin Duncan Photography
Blogs & Podcasts

Articles by Trainer
Advertisement

Related Articles


Advertisement
Featured Stories

Advertisement